Our Mailchimp add-on allows you to add contacts to Mailchimp when a form is successfully submitted.
Step 1
Install and activate the Quform Mailchimp plugin by going Plugins → Add New on the WordPress menu and entering quform mailchimp in the search field.

Step 2
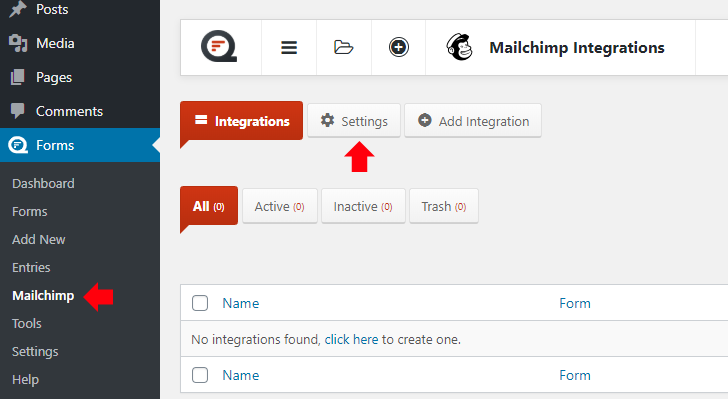
Once you’ve activated the plugin, go to Forms → Mailchimp then go the Settings page.
Step 3
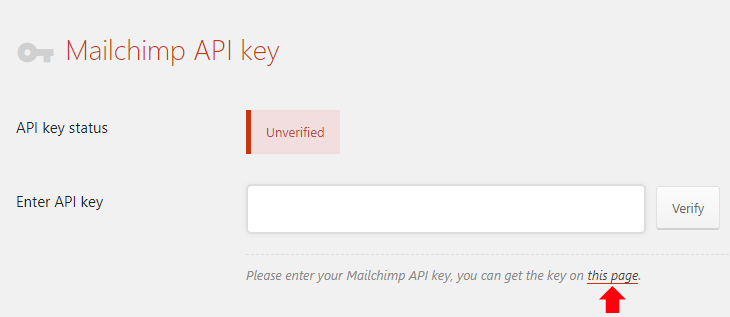
Click the link shown below to get your Mailchimp API key.
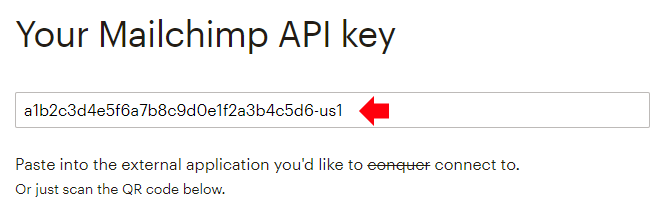
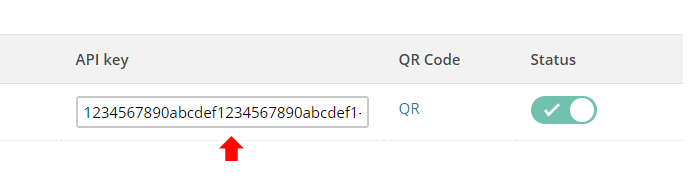
Log into Mailchimp if necessary, and copy the API key from the field.
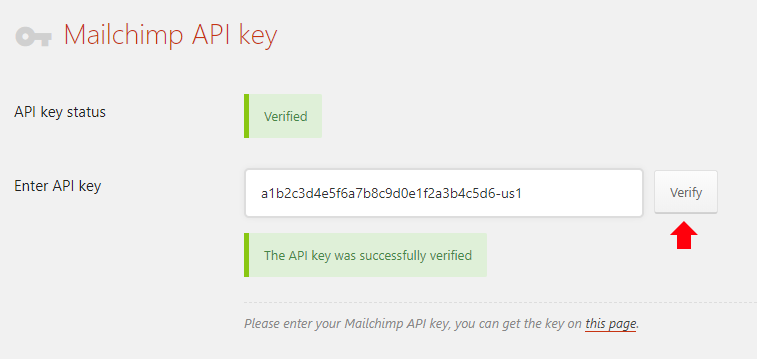
Back on the Quform Mailchimp settings page, paste the API key into the field and click Verify.
Step 4
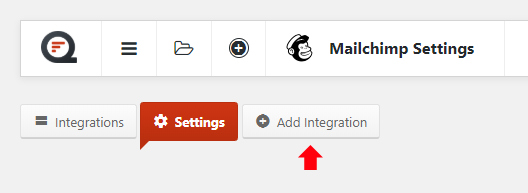
Now it’s time to add an integration, click Add Integration at the top.
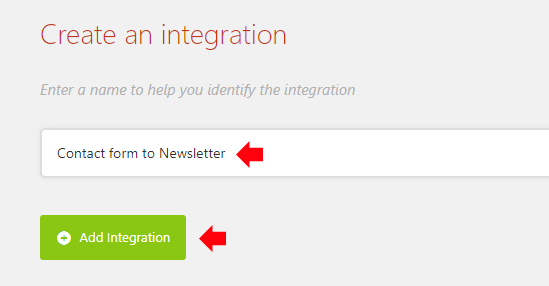
Enter a name for the integration then click Add Integration.
Step 5
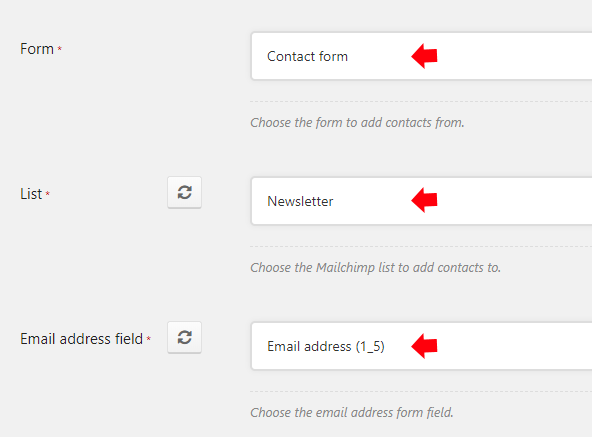
Configure the Form, List and Email address field options.
That’s all you need to do for the integration to work. Configure any other options as needed then, then Save the integration.
If you want, you can now submit the form to make sure that everything is working, then check that the contact has been added successfully at Mailchimp.
Troubleshooting
If the integration is not working, please check the following points.
- Make sure the email address is not already on the list.
- Mailchimp does not accept some fake email addresses such as those ending in @example.com – make sure to test it with a real email address.
- The configured Merge fields can cause it to fail, double check that everything is configured correctly and/or test it with no configured merge fields.
- You can use the plugin Log HTTP Requests to be able to see the response from Mailchimp when the plugin adds a contact. Once this plugin is activated do a test form submission, then go to Settings → Log HTTP Requests and click into the request to mailchimp.com then look for an error message in the response body.
Show legacy instructions
Step 1 – create a WordPress plugin
Create a new folder named quform-mailchimp and inside it create a file named quform-mailchimp.php
Inside the quform-mailchimp.php file add the following code.
1 2 3 4 5 6 7 8 910 11 12 13 14151617 18 19 2021 22 23 24 25 26 27 28 29 30 31 32 33 34 | <?php /* * Plugin Name: Quform Mailchimp Integration * Description: Add subscribers to Mailchimp from Quform forms. * Version: 1.0 */ add_filter('quform_post_process_1', function (array $result, Quform_Form $form) { if (!class_exists('MCAPI')) { require_once dirname(__FILE__) . '/MCAPI.class.php'; } $api = new MCAPI('yourApiKey', true); $listId = 'yourListId'; $email = $form->getValue('quform_1_4'); $mergeVars = array(); // Set the first and last name (optional) $name = $form->getValue('quform_1_3'); $mergeVars['FNAME'] = $name[2]; $mergeVars['LNAME'] = $name[4]; // Other settings $emailType = 'html'; $doubleOptin = false; $updateExisting = false; $replaceInterests = false; $sendWelcome = false; $api->listSubscribe($listId, $email, $mergeVars, $emailType, $doubleOptin, $updateExisting, $replaceInterests, $sendWelcome); return $result; }, 10, 2); |
<?php

/*
 * Plugin Name: Quform Mailchimp Integration
 * Description: Add subscribers to Mailchimp from Quform forms.
 * Version: 1.0
 */

add_filter('quform_post_process_1', function (array $result, Quform_Form $form) {    if (!class_exists('MCAPI')) {
        require_once dirname(__FILE__) . '/MCAPI.class.php';
    }

    $api = new MCAPI('yourApiKey', true);    $listId = 'yourListId';    $email = $form->getValue('quform_1_4');    $mergeVars = array();

    // Set the first and last name (optional)
    $name = $form->getValue('quform_1_3');    $mergeVars['FNAME'] = $name[2];
    $mergeVars['LNAME'] = $name[4];

    // Other settings
    $emailType = 'html';
    $doubleOptin = false;
    $updateExisting = false;
    $replaceInterests = false;
    $sendWelcome = false;

    $api->listSubscribe($listId, $email, $mergeVars, $emailType, $doubleOptin, $updateExisting, $replaceInterests, $sendWelcome);

    return $result;
}, 10, 2);- On line 9, replace the number
1with the form ID - On line 14, replace
yourApiKeywith your Mailchimp API key, see Step 2 below - On line 15, replace
yourListIdthe Mailchimp list ID, see Step 2 below - On line 16, replace
1_4with the Email element unique ID - On line 20, replace
1_3with the Name element unique ID if the form has a Name element, otherwise lines 19-22 can be removed
1 2 3 4 5 6 7 8 9 10 11 12 13 14151617 18 19 2021 22 23 24 25 26 27 28 29 30 31 32 33 34 35 | <?php /* * Plugin Name: Quform Mailchimp Integration * Description: Add subscribers to Mailchimp from Quform forms. * Version: 1.0 */ function my_mailchimp_integration(array $result, Quform_Form $form) { if (!class_exists('MCAPI')) { require_once dirname(__FILE__) . '/MCAPI.class.php'; } $api = new MCAPI('yourApiKey'); $listId = 'yourListId'; $email = $form->getValue('quform_1_4'); $mergeVars = array(); // Set the first and last name (optional) $name = $form->getValue('quform_1_3'); $mergeVars['FNAME'] = $name[2]; $mergeVars['LNAME'] = $name[4]; // Other settings $emailType = 'html'; $doubleOptin = false; $updateExisting = false; $replaceInterests = false; $sendWelcome = false; $api->listSubscribe($listId, $email, $mergeVars, $emailType, $doubleOptin, $updateExisting, $replaceInterests, $sendWelcome); return $result; } add_filter('quform_post_process_1', 'my_mailchimp_integration', 10, 2); |
<?php

/*
 * Plugin Name: Quform Mailchimp Integration
 * Description: Add subscribers to Mailchimp from Quform forms.
 * Version: 1.0
 */

function my_mailchimp_integration(array $result, Quform_Form $form) {
    if (!class_exists('MCAPI')) {
        require_once dirname(__FILE__) . '/MCAPI.class.php';
    }

    $api = new MCAPI('yourApiKey');    $listId = 'yourListId';    $email = $form->getValue('quform_1_4');    $mergeVars = array();

    // Set the first and last name (optional)
    $name = $form->getValue('quform_1_3');    $mergeVars['FNAME'] = $name[2];
    $mergeVars['LNAME'] = $name[4];

    // Other settings
    $emailType = 'html';
    $doubleOptin = false;
    $updateExisting = false;
    $replaceInterests = false;
    $sendWelcome = false;

    $api->listSubscribe($listId, $email, $mergeVars, $emailType, $doubleOptin, $updateExisting, $replaceInterests, $sendWelcome);

    return $result;
}
add_filter('quform_post_process_1', 'my_mailchimp_integration', 10, 2);- On line 14, replace
yourApiKeywith your Mailchimp API key, see Step 2 below - On line 15, replace
yourListIdthe Mailchimp list ID, see Step 2 below - On line 16, replace
1_4with the Email element unique ID - On line 20, replace
1_3with the Name element unique ID if the form has a Name element, otherwise lines 19-22 can be removed - On line 35, replace the number
1with the form ID
Step 2 – get your Mailchimp API key and list ID
API key
Click here to get your Mailchimp API key.
You can alternatively get in Mailchimp at Account → Extras → API keys.
List ID
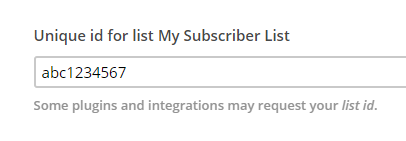
In Mailchimp go to Lists, then for the list you want to add the subscriber to click on the down arrow on the right hand side then click Settings.


At the bottom of the settings the list ID is displayed.
Step 3 – install the Mailchimp PHP client
Download the Mailchimp PHP API from here and extract the zip file. Put the MCAPI.class.php file into the folder you created in Step 1 quform-mailchimp. Upload the quform-mailchimp folder to the web server at wp-content/plugins then go to the Plugins page within WordPress and activate the plugin Quform Mailchimp Integration and you’re done.
Only subscribe if the user checks a Checkbox
In the code in Step 1, find this line.
1 | $api = new MCAPI('yourApiKey'); |
$api = new MCAPI('yourApiKey');Above it, add the following code.
1 2 3 | if ($form->getElement('quform_1_5')->isEmpty()) { return $result; } |
if ($form->getElement('quform_1_5')->isEmpty()) {
    return $result;
}- Replace
1_5with the Checkbox element unique ID
Only subscribe if the user checks a Radio Button
In the code in Step 1, find this line.
1 | $api = new MCAPI('yourApiKey'); |
$api = new MCAPI('yourApiKey');Above it, add the following code.
1 2 3 | if ($form->getValue('quform_1_5') != 'Yes') { return $result; } |
if ($form->getValue('quform_1_5') != 'Yes') {
    return $result;
}- Replace
1_5with the Radio Button element unique ID - Replace
Yeswith value of the radio button option that should subscribe the user
Troubleshooting
If the integration does not work, double check the form ID and email element unique ID are correct in the code. Also make sure to test it with an email address that does not already exist in the list.
To debug the integration you can log the response from Mailchimp to the WordPress debug log. To enable the response logging add the code below to the function, above the line return $result;.
1 2 3 | if ($api->errorCode && defined('WP_DEBUG') && WP_DEBUG) { Quform::log($api->errorCode, $api->errorMessage); } |
if ($api->errorCode && defined('WP_DEBUG') && WP_DEBUG) {
    Quform::log($api->errorCode, $api->errorMessage);
}Then temporarily enable debug logging then submit the form again and check for an error message in the wp-content/debug.log file. Once you’ve solved the issue you can turn off debug logging.