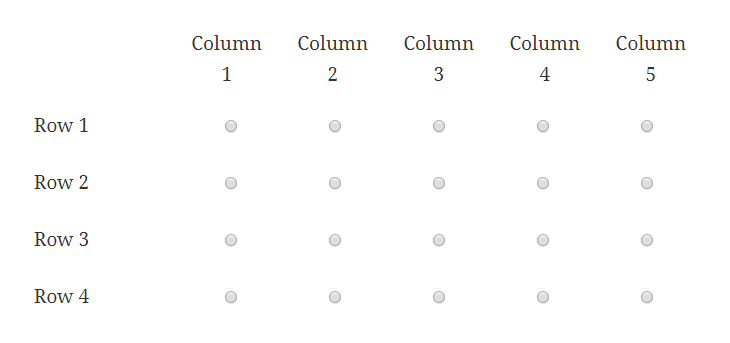
Step 1 – column headings
Add a Group element to the form. Then go into the Group settings and on the Styles click Add a style and choose the selector Group wrapper then add the following CSS.
1 2 | margin-left: 150px; text-align: center; |
margin-left: 150px;
text-align: center;
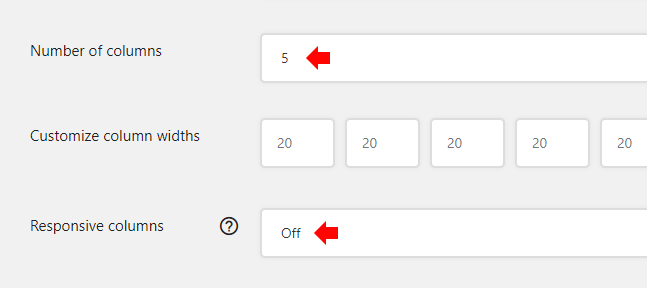
Add a Column Layout element inside the Group. Then click the cog icon at the bottom right to go into the settings for the Column Layout and set the Number of columns to 5 and set Responsive columns to Off.
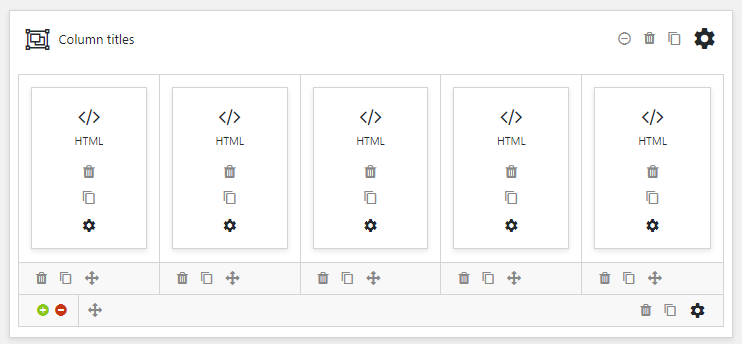
Then add one HTML element into each of the columns. In the settings for each of the HTML elements at the HTML field type in the column title. You should end up with a blueprint as shown below.
Step 2 – radio button rows
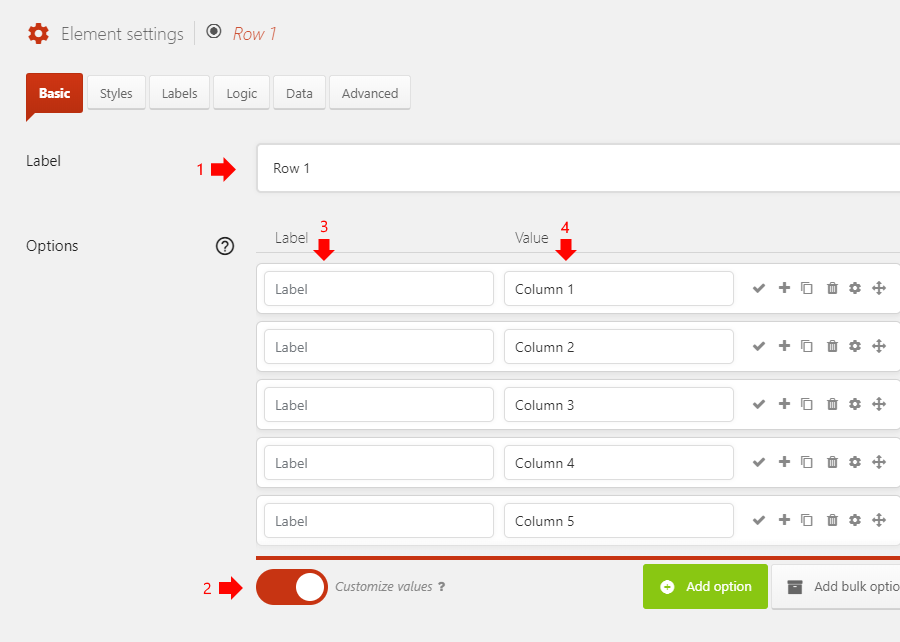
Add a Group element to the form, then go to the settings for it and on the Labels tab set the Label position option to Left.
Then add a Radio Buttons element inside the Group and configure it as described below.
On the Basic tab:
- Set the Label text
- Click Customize values below the Options
- Set each option Label to be empty
- Set each option Value to match the column titles
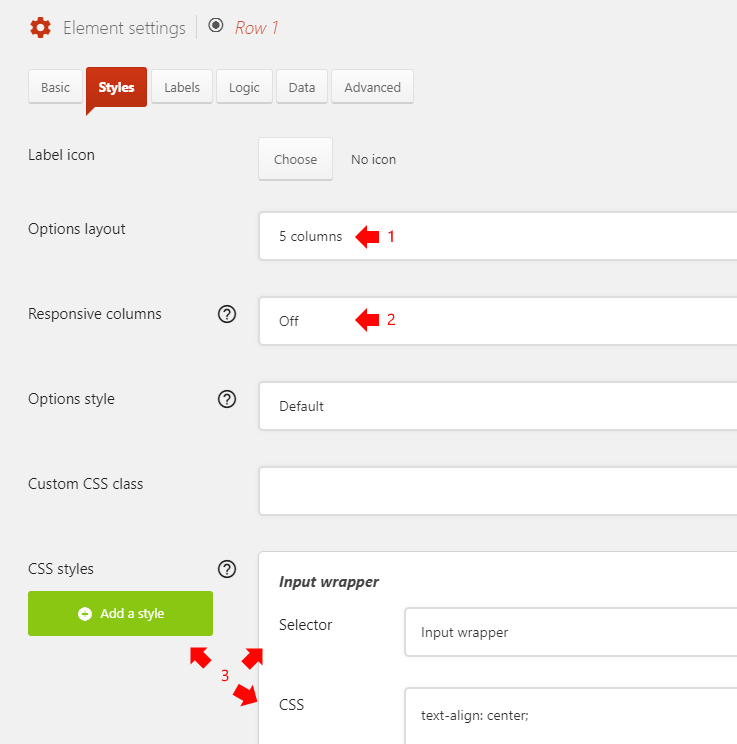
On the Styles tab:
- Set Options layout to 5 columns
- Set Responsive columns to Off
- Click Add a style at the bottom and choose the selector Input wrapper and enter the CSS
text-align: center;
Now, click the duplicate icon at the Radio Buttons element to create a copy and then just change the label to make the second row of radio buttons. You can duplicate the element for as many rows as you need.

Step 3 – final steps
Go to Edit Form → Settings → Style → Global and set Responsive elements to Off, this will preserve the matrix layout on devices.